
Meal prepping is a powerful tool for anyone looking to save time, eat healthier, and reduce stress during the week. By preparing meals in advance, you can ensure that you have nutritious, ready-to-eat options available, making it easier to stick to your dietary goals. This guide will walk you through the benefits of meal prepping, offer step-by-step instructions, and provide tips for keeping your meals fresh and delicious. Plus, we’ve included affiliate links for some essential meal prep tools to help you get started.
Benefits of Meal Prepping
Time-Saving
One of the most significant benefits of meal prepping is the time it saves during busy weekdays. By dedicating a few hours on the weekend to preparing your meals, you eliminate the need to cook from scratch each day. This frees up time for other activities and reduces the stress of daily meal preparation.
Healthier Eating
Meal prepping allows you to have complete control over your ingredients and portion sizes, leading to healthier eating habits. You can ensure your meals are balanced with lean proteins, whole grains, and plenty of vegetables, avoiding the temptation of unhealthy fast food or takeout.
Cost-Effective
Buying ingredients in bulk and reducing food waste by using up everything you purchase can save you a significant amount of money. Prepping meals at home is often cheaper than dining out, and you can use your savings for other essentials or treats.
Stress Reduction
Knowing that your meals are already prepared can greatly reduce the stress associated with deciding what to eat each day. This can help you maintain a consistent eating schedule and avoid last-minute unhealthy food choices.
Essential Tools and Ingredients
To get started with meal prepping, you’ll need some essential tools and ingredients:
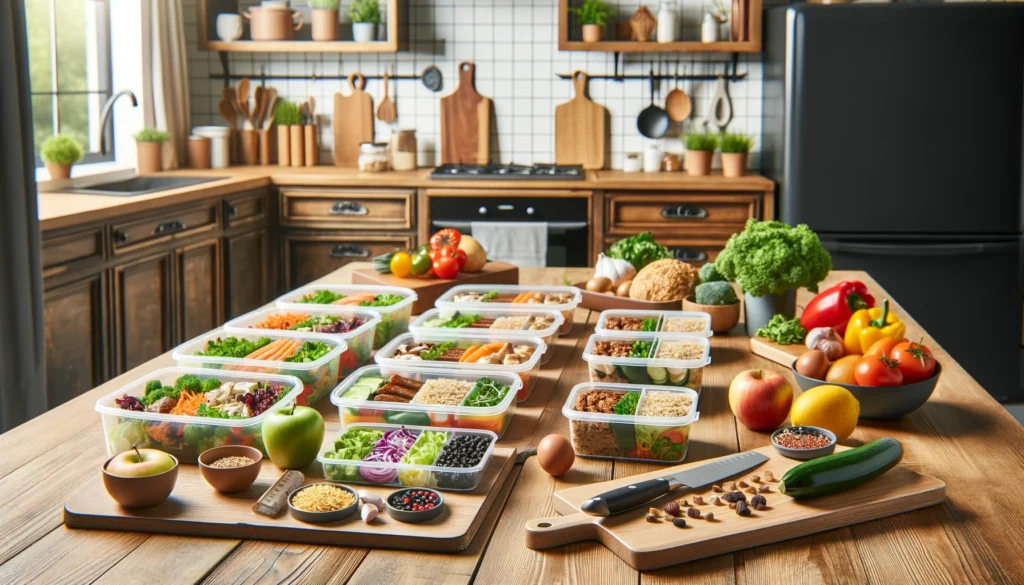
- Meal Prep Containers: Durable, reusable containers to keep your meals fresh. Shop Now
- High-Quality Chef’s Knife: For efficient chopping and slicing. Shop Now
- Cutting Board: A sturdy cutting board is essential for preparing vegetables and meats.
- Measuring Cups and Spoons: For accurate portion control and recipe measurements.
- Mixing Bowls: Various sizes for mixing ingredients and preparing multiple recipes at once.
- Slow Cooker or Instant Pot: For easy, hands-off cooking of large batches of food.
- Food Scale: Useful for measuring portions, especially if you’re tracking your macros.
Step-by-Step Guide to Meal Prepping
Step 1: Plan Your Meals
- Choose Recipes: Select a variety of recipes that include lean proteins, whole grains, and plenty of vegetables. Consider breakfast, lunch, dinner, and snacks to cover all your meals.
- Create a Shopping List: Write down all the ingredients you’ll need for the week. Organize your list by section (produce, meats, dairy, etc.) to make your shopping trip more efficient.
- Schedule Your Prep Time: Set aside a few hours on a day that works best for you, typically Sunday or any day you have some free time.
Step 2: Shop for Ingredients
- Buy in Bulk: Purchase items like grains, proteins, and vegetables in bulk to save money. Look for sales and discounts on staple items.
- Fresh Produce: Choose fresh, seasonal produce for the best flavor and nutrition. Don’t be afraid to incorporate frozen vegetables and fruits as they are often just as nutritious and can save time in preparation.
Step 3: Prepare Your Ingredients
- Wash and Chop: Clean and cut all your vegetables and fruits. This makes it easier to assemble your meals quickly.
- Cook Proteins: Grill, bake, or sauté your proteins (chicken, beef, tofu, etc.). Season them simply so they can be used in various dishes throughout the week.
- Cook Grains: Prepare grains like rice, quinoa, and pasta. These can be stored in the refrigerator and added to meals as needed.
Step 4: Assemble Your Meals
- Divide Evenly: Portion out your ingredients into meal prep containers. Use a food scale to ensure consistent portion sizes, especially if you’re tracking your nutrition.
- Mix and Match: Create a variety of meals by combining different proteins, grains, and vegetables. This keeps your meals interesting and prevents boredom.
- Label Containers: Mark each container with the meal type and date. This helps you keep track of what needs to be eaten first and ensures you enjoy your meals at their freshest.
Sample Meal Prep Menu
Breakfast
- Overnight Oats: Combine rolled oats, almond milk, chia seeds, and fresh berries. Refrigerate overnight. In the morning, you have a ready-to-eat, nutritious breakfast.
- Egg Muffins: Bake a mixture of eggs, spinach, tomatoes, and cheese in a muffin tin. These can be stored in the refrigerator and reheated for a quick breakfast.
Lunch
- Quinoa Salad: Mix cooked quinoa with chickpeas, cucumbers, cherry tomatoes, and a lemon vinaigrette. Store in individual containers for a quick, healthy lunch.
- Chicken Stir-Fry: Sauté chicken with bell peppers, broccoli, and a soy-ginger sauce. Serve with brown rice. This meal reheats well and is perfect for lunch or dinner.
Dinner
- Salmon and Veggies: Bake salmon with asparagus and sweet potatoes. Store in containers for a balanced and delicious dinner option.
- Vegetable Curry: Cook a blend of seasonal vegetables in a coconut curry sauce. Serve with basmati rice. This dish can be made in large batches and frozen for later use.
Snacks
- Fruit and Nut Mix: Combine dried fruits, nuts, and seeds for a healthy, portable snack.
- Hummus and Veggies: Prepare hummus and portion it into small containers. Serve with sliced vegetables like carrots, cucumbers, and bell peppers.
Tips for Successful Meal Prepping
- Keep it Simple: Start with a few easy recipes and gradually add more complexity as you become more comfortable with the process.
- Stay Organized: Use a meal planning app or calendar to keep track of your meals. This helps you stay on track and ensures you don’t forget any ingredients.
- Proper Storage: Ensure all meals are stored in airtight containers to maintain freshness. Use stackable containers to save space in your refrigerator.
- Batch Cook: Prepare large quantities of staple ingredients like grains and proteins that can be used in multiple meals throughout the week.
- Use Freezer-Friendly Recipes: Prepare meals that can be frozen and reheated. This is especially useful for those weeks when you don’t have time to meal prep.
Storing and Reheating
- Refrigeration: Most meal preps can be stored in the refrigerator for up to 4 days. Make sure to cool the food before refrigerating to maintain the quality.
- Freezing: For longer storage, freeze meals in suitable containers. Thaw in the refrigerator before reheating. Freezing extends the shelf life of your meal preps and helps prevent food waste.
- Reheating: Reheat meals in the microwave or oven, making sure to heat evenly. Use a microwave cover to prevent splatters and retain moisture. Stirring halfway through reheating ensures even heat distribution.
Conclusion
Meal prepping is an effective way to save time, eat healthier, and reduce stress. With the right tools and a little planning, you can enjoy nutritious, delicious meals throughout the week. Whether you’re a busy professional, a student, or someone looking to improve your eating habits, meal prepping can be a game-changer. Start with simple recipes, stay organized, and enjoy the convenience and health benefits of having your meals ready to go.
Feel free to share your favorite meal prep recipes, tips, and photos in the comments below. Let’s make meal prepping a breeze!
Affiliate Disclosure
Some links on this website are affiliate links. This means I may earn a commission if you click through and make a purchase, at no additional cost to you. I only recommend products and services I trust and believe will add value to my readers. Your support helps maintain this blog. Thank you!